Here is the 3DPad by OotSideBox. This Arduino shield adds touchless gestures to any project. It has been developped / designed by Jean-Noël Lefebvre, a french inventor. The shield was founded on IndieGogo and is now built in SeeedStudio. It is sold on Tindie. This is great to see such a great french open-source product.
 |
 |
 |
 |
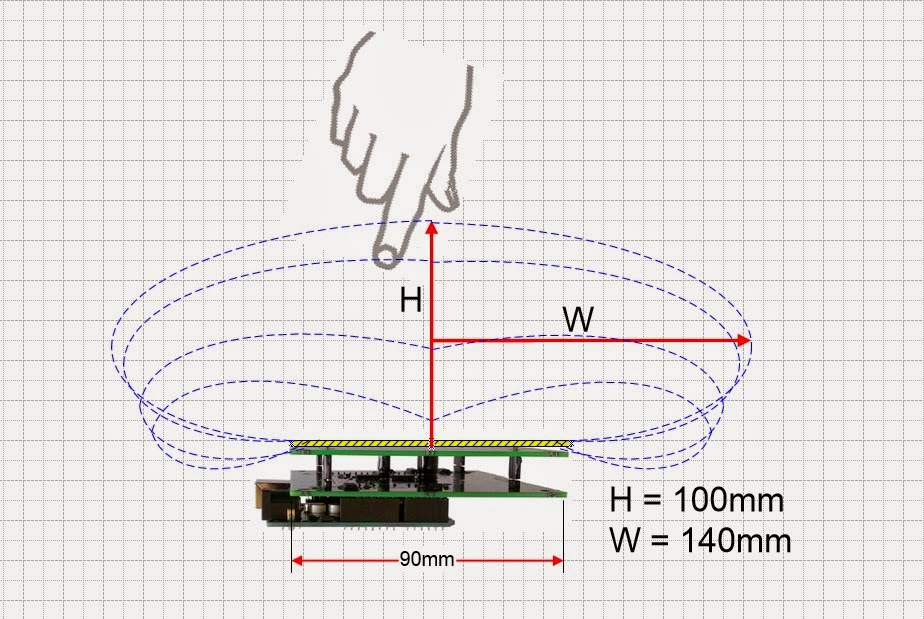
The 3DPad adds tridimensional (X, Y, Z) touchless gestures control. It could sense the position of a finger (or object) above its surface, detect its coordinates, it’s elevation, 4 directions gestures, « virtual click » and even doing circles. It is very reactive and precise (when no electric objects near it).
Here is me, playing with the device :
It works by projecting an electric field in front of the touch surface using 4 electrodes, and measure the position where this field has been perturbated. Here is a very informative interview of the inventor on Atmel’s blog, explaining the principles behind 3DPad.
It is also very worth noting 3DPad also works under many surfaces, like paper, cardboard, wood, glass, plastics, etc…
Specifications
- 61 gram (3Dpad shield only)
- 90 gram (including Arduino UNO board)
Supply voltage :
- 12 Vdc (max 18Vdc)
Power consumption :
- 3Dpad shield only: 180 milli Watts
- Iincluding Arduino UNO board: 720 milli Watts
Applications
So far, 3DPad has been used in a variety of projects :
- Touchless 3D mouse
- Air MIDI controller
- Touchless 3D TV control (commercial application)
First start
OotSideBox’s blog is very clear and informative, especially the « Getting Started Guide » page, so I won’t go too far, but here is how to use the device for the first time :
- Download the arduino source and unzip it in your arduino sketchbook folder
- Load Arduino IDE (1.6.4 was fine for me) and the 3DPad sketch
- Plug the shield on the Arduino, plug the arduino in both USB and 12-18v powering socket. The latter is very important, and the device won’t work without it.

- Compile and upload the sketch
- Open the serial monitor, set it to 115200 bauds. You should see some details on the serial monitor.
- This is the first time the shield is being used, so it will autamatically perform a calibration. Don’t touch it until the process is complete.

- Now you could see gestures in the serial monitor. If you press « V », you could see the raw values sent by the device. « G » sets the gestures mode back, and « A » executes the autocalibration routine. « S » executes the setup routine (The sensor starts using the values previously stored in the EEprom, and quickly search for the current tuning values)


The device is operational !
Go a little deeper with the device
OotSideBox provides some usefull tools to play with the device :
- A VB6 software

- A processing sketch. I really like processing IDE so I’m using this one.


There has been some experiments with sensing in water :
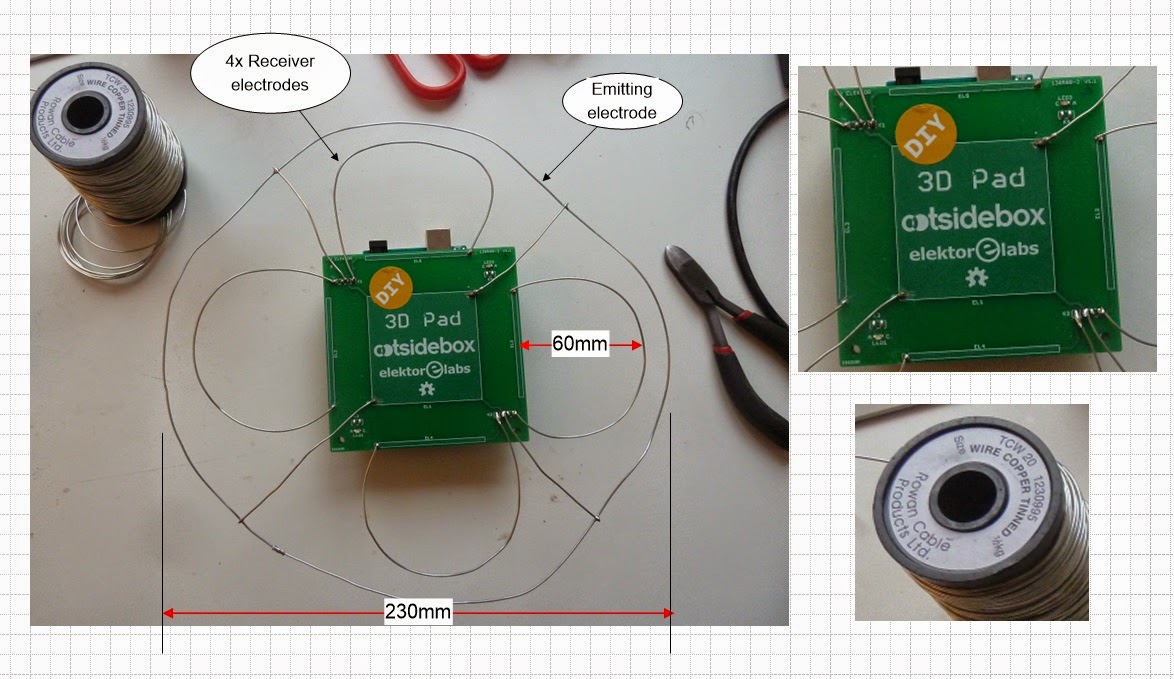
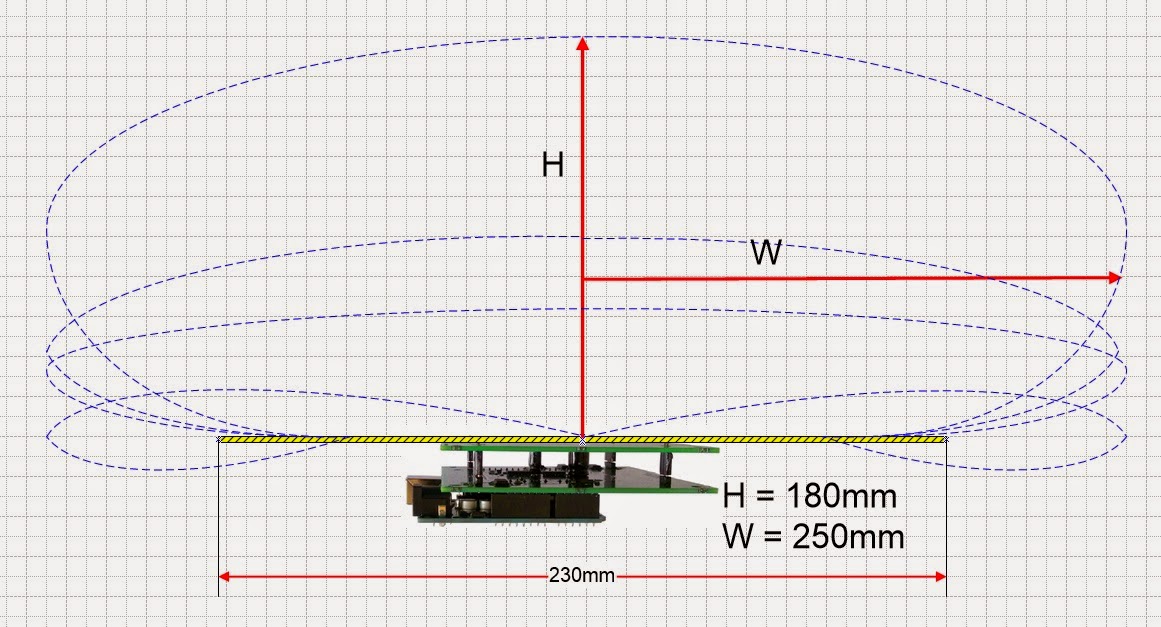
Expanding the sensing range :
There has been some experiments with expanding the sensing range, using copper wires :
Conclusion
The OotSideBox’s 3DPad is a really neat piece of hardware to add touchless control to any project. It is very reactive and precise and the provided software gives everything we could ever need : tridimentional sensing, gestures, click.
